Welcome!


Welcome! Presenting, I'm an online high school technology Instructor and have been teaching online since 2003! Additionally, I taught in Brick and Mortar for 7 years and 2 years of that was with at-risk students.

My Bachelor of Science is from Texas A&M University and I've added other certificates to that. I've learned so much from the first 3 months of my Education Media and Design Technology Masters program at Full Sail University and I am looking forward to the next 9 months. I'll be blogging my journey here, so visit here often. You won't regret it!

Sunday, August 1, 2010

BP13_FlashCS5_post3wk4

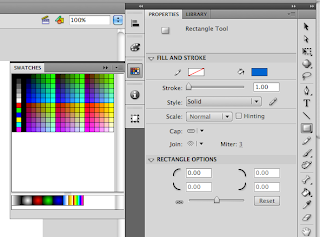
The properties panel as I do things on the stage. I didn’t have a clue it was changing until it was pointed out in the Lynda.com tutorial pointed it out. To the far right of the properties panel is the toolbar for manipulating artwork. Keep in mind that when certain items are selected on it there are additional tools that are tacked onto the bottom of the toolbar. These are used only in association of the item you clicked. They will go away when another item on the toolbar is clicked.

In the tutorial, Todd, the presenter, talks about other panels that aren’t on my Flash environment. He did say that you can get them by going to the “Windows” link at the top of your Flash environment. He doesn’t tell you how to get them to look like the ones he has on his Flash environment. Here is how you do that.

1. Go to “Windows”

2. Click “Color”

3. The panel shows up

4. Click and drag the panel to the left side of the Properties panel

5. Then it pops next to it

6. Put your mouse over the left side of the Color icon to resize

7. Repeat for each panel that you want a shortcut icon for

8. Each new panel you drag over will be auto resize to the first one.

That is all for now. Check back soon to see my other posts.

BP13_FlashCS5_post2wk4


I was just looking around like a always do, when I’m learning something new and discovered that you can share your Flash screen with up 3 people. This is a rich feature for collaboration. It includes live voice interaction, chat, video and whiteboards. You can even brand your meetings with a unique url.

In the Lynda.com there is a magnificent tutorial series by Todd Perkins on Flash CS5. He talks about the two basic file types used:

  1. .fla - the working file
  2. .swf - the output file you’ll see on the web.

When you open Flash a screen comes up and that’s where you’ll choose the .fla file you want to work with. I chose Action Script 3.0, which is a working .fla file. Action Script is Flash’s proprietary code language.

The working file has several features that are familiar to me: the stage, timeline, and properties panel. Under the properties heading of the properties panel you can edit the stage size, ruler units, frames per second, fps, of your movie, and stage background color. I will probably just leave the defaults.

Next time I'll be talking more about what I learned about panels, toolbars, hand tools, and workspaces. I really hope you are getting something out of this because I sure am. See you then.


BP12_FlashCS5

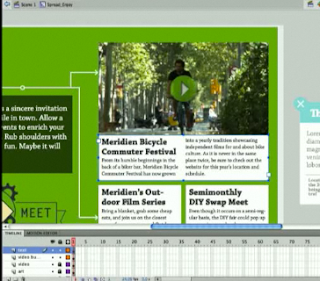
The Flash Professional CS5 Overview, included in our FSO EMDT Mac Pro applications, gave me loads of information. A lot has changed since I used it years ago, but it looks like there have been some fantastic practical features added. The Text Engine for one because you can add inDesign material to your Flash movie and it maintains the formatting. Plus, you can edit
inDesign animation pathways in Flash.

When it comes to working on a team project, Flash is superb! More than one person can work on a file at the same time, so production is quicker due to the xml database and .xfl file format. I wonder if we’ll be using this feature! We probably will, since we’ve been doing group projects in each course.

Tons of code snippets are included with Flash CS5. You can create and save your own custom code snippets to use in future projects. The cool thing is your custom classes or code appears in the drill down, when writing action script. That is a real time saver!

Wow, the Physics Engine is dynamic with the bone structures IK or armature system. In the Overview video the presenter made it look so easy. Just a few clicks and the street signs came alive. I hope it is that way, when we start to use it.

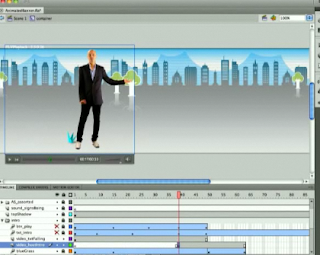
Placing videos in your movies is nothing new, but editing your movie in real-time with your video isn’t. You just stop your video where you want the action to begin and add the script to your movie. For instance, if I want to have a motion in my video to trigger an event in the movie, I can do that without running the video separate from the movie. There’s none of the run the movie to see if the timing is right; it just is because you are working with the video and movie in tandem. Now that is a super time saver!


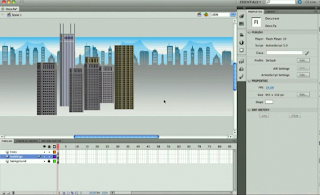
The Deco drawing tool has new brushes. You can create a building within seconds with the building brush tool. I looked for this feature and couldn’t find it, so I’ll need to take a look at the Overview again to see where it is. The learning curve on this tool might be a bit over my head at the moment.


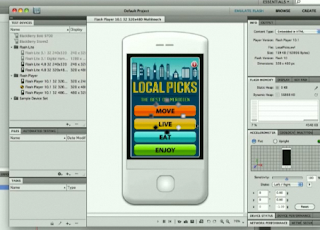
Using Flash Builder and Mobile Content looks like fun, but will be down the road after I get the basics down. The good thing is you can edit classes in Flash Pro or builder. If I choose to use Flash Builder it will create a project for me and build it out. After that I can flip back to Flash Pro, easily. Also, if I’m building a Mobile application I can view it as such. It functions like a real phone, but it’s 2D. That can save time in the beta phase of your application. To cool!

I can’t wait to use Flash CS5 with all of its wonderful features. The possibilities are endless in what you can create. It is so far beyond what I was using years ago; it’s like I’ve never used it before. I’ll be going through some tutorials, so stay tuned.

Saturday, July 24, 2010

BP11_Platogo1minuteVideo

Hope you like it!

BP10_Comment2BrookeMcKaig

"Follow this link to my comments on Brook's blog."


BP9_Comment2Kiylise Crutchfield

"Follow this link to my comments on Kiylise's blog."

BP8_Platogo

Platogo is a social networking Flash gaming site. It works like this. You upload your flash games and then add friends, challenges, rewards, and level editor components. Compare you’re your scores to friends, challenge them in game play, give rewards and edit one of your game levels with the level editor.

Some of the other great things about Platogo are the plethora of tutorials, developer center, and the earn money features. Some of the tutorials are about: game loading, getting started, high scores, rewards, money, and game data. In the developer center you find the Facebook Guide, social feature components, and how to monetize your game. To make money with your game you can use ads plus sell game and player upgrades.

For a wider audience for you games you can share them with the entire Platogo community and/or get even more exposure by loading them on to Facebook using the Platogo guide provided. This manual is straightforward and gives you step-by-step instructions on how to that.

To broaden my student’s perspective on Flash games, I’m going to have them play and evaluate games on Platogo. It always helps to see how someone else puts something together because you get ideas of how you can make it better or different. Also, you might say, “Wow, how did they do that?,” which gets curiosity and creativity going. It makes you want to figure out how they did it.

My online gaming students are going to be excited about this site, but I’m going to check it out further to see if I can create a private Facebook group that they can load their games to. Furthermore, I’ll need school and parent permission.

Friday, July 16, 2010

BP6_commentJenAlman_fromCrystalDavis


I've used bubbl.us for concept mapping but haven't used cMapper. Follow this link to my comments on Jen Alman's blog.


BP5_commentJessicaGoodenowFromCrystalDavis


Jessica Goodenow has taken a look at GoAnimate to see my comment on her blog just click the word link!

BP4_Wikispaces

Wikispaces.com is a fabulous, free educator Web 2.0 tool since it has a private members only option, easy creation of student accounts, effortless posting of various media, and site customization. Creating your wiki is straightforward and making it private is just a click of a radio button. Inviting your students and creating their accounts is painless because you don’t need their email addresses. In my case this is important because I’ll have 192 students in the Fall. Yikes! Did I say that out loud? I like the idea of customizing the way my wiki looks by choosing the theme and colors I want to give it that personal touch. It allows posting of files, images, videos and other media. Additional awesome features include as many wikis as you need or want, infinite storage, and across wiki administration or site admin.

Finding a way for my online students to collaborate can be challenging, but Wikispaces will solve some of that by providing a safe online environment where students will rate the games they play, comment on other student’s game ratings, and learn from each other. Furthermore, it allows me to track or monitor each student’s post with an email notification system. That makes it practically trouble-free for me to check what each student is doing and be able to address any concerns I have right away.

In a couple of minutes I had my Game Design Wiki setup and with another a couple of hours I’ll have an amazing wiki to share with my students. The interface is fantastic! There is a great “help” section, FAQ area, wiki walk through or tour, and a link to educational wikis’ to see what other educators are doing.

Friday, July 2, 2010

BP3_yoyogames


GameMaker (http://www.yoyogames.com's game engine) is an excellent 2D game engine that is easy to use and a free download. Students can create educational or learning games for any assignment you choose. First, students should play educational games from yoyogames to get the idea. Here are a few examples to checkout to see the potential: MissleMath (squareRoots), Euromap, Halo Math, Cell-Abration, and Mental Playground. Some of the games above were created as student school projects! Isn’t that great? There are tons more, but keep in mind you need to download these on a PC to play them and to use GameMaker.

Also, you can have your students play other Educational games from FunFlow: Arithmetic Challenge, Flags, Da Vinci Cannon (trajectory), Typing Challenge, Skill Test, Brain Test, Countries, Globe Trotter XL and Construction Fall (trajectory). These can all be played on a PC or Mac and they are standalone applications. The screenshot above is from http://www.yoyogames.com.

Second, students rate the educational games they played on yoyogames and/or FunFlow. This is important because students will learn what they like in a game, peaks their interest and engages them. Yoyogames has a great rating system for their games and I would suggest that you have your students use that system. Be sure to let them know, if the game they played was fun then it will probably be fun for others. Also, stress that the goal of an educational game is to make it fun while you learn.

Third, students download GameMaker for free by clicking “Make” at the top of yoyogames and then the download icon. This step shouldn’t take very long. After that you have students do these two tutorials – “What makes a good game?” and “Your First Game.” You can find these by clicking “Make” and look to the left for “Tutorials” or just put the word “Tutorial” in the yoyogames search tool. These two tutorials will get the student familiar with the GameMaker environment.

Finally, your students are ready to create their first educational game with your guidance. They will need to create a game plan: subject (Math, Science, English, History), title, idea of the game, and images needed. Don’t forget to mention copyright law! After that they will build their game in GameMaker. You’ll be amazed at what your students come up with!

Note: GameMaker is for PC only, but if you want a Mac alternative

( http://developer.apple.com/games/gameenginesonmac.html ).
Wednesday, June 30, 2010

BP2_iGoogle Screen Shots

I am really seeing the value of iGoogle! Rena pointed out in her first Wimba that it would be a good idea to create a tab in iGoogle for each course because it goes so fast that things get forgotten. I am definitely going to do that. During the break I hope I can get the previous courses done, so I'll have those tabs too. Below you'll find my screen shots of iGoogle!

My first iGoogle Home page from the first month.


My new iGoogle Home page.


iGoogle FSO tab


iGoogle AR/CBL tab


iGoogle ETC tab

BP1_GoogleReader


There are so many RSS feeds that I wanted to follow, but I have narrowed it down to 5. These are the best of my rss feed search.

RSS feed 1 - Mike Darga's Game Design Blog
http://mikedarga.blogspot.com/
Since I'm a high school game design Instructor I thought it would be great to keep up with at least one game design blog. I chose this one because I like some of the games he talked about and that he is working in the game design field right now. Also, there are links to real interesting articles that I can show my students in the Fall. For instance, “21 behaviors of Great Designers” which has a wealth of information for beginner designers to avoid pitfalls and not have to reinvent the wheel. The image to the left is a screenshot taken on 6-30-2010 of what's in this article on Mike Darga's Blog, http://mikedarga.blogspot.com/ Scroll down on this page and look to the right.

RSS feed 2 – Edutopia
http://www.edutopia.org/

Edutopia has 12 different blogs and I really only wanted to rss feed 5 of them, but there was no option to do that. So I subscribed to get the following 5 feeds: Education Innovation, Education Technology, News and Opinion, Project-Based Learning, and Student Engagement. If you want to see the whole list of blogs go to their site and view the dropdown navigation bar link for “Blogs.” I looked on the iNACOL site but they didn’t a feed to subscribe to, unfortunately.

RSS feed 3 – Gaming and Culture CNet feed
http://news.cnet.com/gaming-and-culture/?tag=mncol

All the current gaming news is here! If you wanted to talk with your gaming friends about the latest games coming out or the possible delay of the game you want, this is the feed to subscribe to. The image to the right is a screen capture of CNet's Gaming and Culture Blog taken on 6-30-2010, http://news.cnet.com/gaming-and-culture/?tag=mncol

RSS feed 4 – The Social
http://news.cnet.com/the-social/?tag=mncol

I think this one will prove to an interesting one! If you want to be on the cutting-edge of how social networking is shaping our world, then subscribe to this feed. In one of the feed articles Facebook announces the first-time-ever VP of Global Public Policy. She’ll be based in Washington DC, but start in July at the Palo Alto, CA office.

RSS feed 5 – The 404 Podcast
http://www.cnet.com/the-404-podcast/

The feed is rich with current information on social media, video games and tech gadgets. Got to love those gadgets!