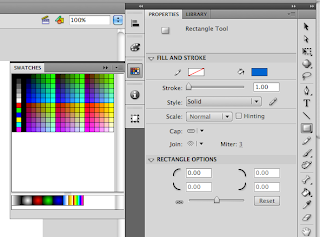
The properties panel as I do things on the stage. I didn’t have a clue it was changing until it was pointed out in the Lynda.com tutorial pointed it out. To the far right of the properties panel is the toolbar for manipulating artwork. Keep in mind that when certain items are selected on it there are additional tools that are tacked onto the bottom of the toolbar. These are used only in association of the item you clicked. They will go away when another item on the toolbar is clicked.
In the tutorial, Todd, the presenter, talks about other panels that aren’t on my Flash environment. He did say that you can get them by going to the “Windows” link at the top of your Flash environment. He doesn’t tell you how to get them to look like the ones he has on his Flash environment. Here is how you do that.
1. Go to “Windows”
2. Click “Color”
3. The panel shows up
4. Click and drag the panel to the left side of the Properties panel
5. Then it pops next to it
6. Put your mouse over the left side of the Color icon to resize
7. Repeat for each panel that you want a shortcut icon for
8. Each new panel you drag over will be auto resize to the first one.
That is all for now. Check back soon to see my other posts.

No comments:
Post a Comment
Thank you for commenting!