Welcome!


Welcome! Presenting, I'm an online high school technology Instructor and have been teaching online since 2003! Additionally, I taught in Brick and Mortar for 7 years and 2 years of that was with at-risk students.

My Bachelor of Science is from Texas A&M University and I've added other certificates to that. I've learned so much from the first 3 months of my Education Media and Design Technology Masters program at Full Sail University and I am looking forward to the next 9 months. I'll be blogging my journey here, so visit here often. You won't regret it!

Sunday, August 1, 2010

BP13_FlashCS5_post3wk4

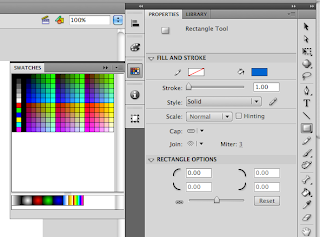
The properties panel as I do things on the stage. I didn’t have a clue it was changing until it was pointed out in the Lynda.com tutorial pointed it out. To the far right of the properties panel is the toolbar for manipulating artwork. Keep in mind that when certain items are selected on it there are additional tools that are tacked onto the bottom of the toolbar. These are used only in association of the item you clicked. They will go away when another item on the toolbar is clicked.

In the tutorial, Todd, the presenter, talks about other panels that aren’t on my Flash environment. He did say that you can get them by going to the “Windows” link at the top of your Flash environment. He doesn’t tell you how to get them to look like the ones he has on his Flash environment. Here is how you do that.

1. Go to “Windows”

2. Click “Color”

3. The panel shows up

4. Click and drag the panel to the left side of the Properties panel

5. Then it pops next to it

6. Put your mouse over the left side of the Color icon to resize

7. Repeat for each panel that you want a shortcut icon for

8. Each new panel you drag over will be auto resize to the first one.

That is all for now. Check back soon to see my other posts.

BP13_FlashCS5_post2wk4


I was just looking around like a always do, when I’m learning something new and discovered that you can share your Flash screen with up 3 people. This is a rich feature for collaboration. It includes live voice interaction, chat, video and whiteboards. You can even brand your meetings with a unique url.

In the Lynda.com there is a magnificent tutorial series by Todd Perkins on Flash CS5. He talks about the two basic file types used:

  1. .fla - the working file
  2. .swf - the output file you’ll see on the web.

When you open Flash a screen comes up and that’s where you’ll choose the .fla file you want to work with. I chose Action Script 3.0, which is a working .fla file. Action Script is Flash’s proprietary code language.

The working file has several features that are familiar to me: the stage, timeline, and properties panel. Under the properties heading of the properties panel you can edit the stage size, ruler units, frames per second, fps, of your movie, and stage background color. I will probably just leave the defaults.

Next time I'll be talking more about what I learned about panels, toolbars, hand tools, and workspaces. I really hope you are getting something out of this because I sure am. See you then.


BP12_FlashCS5

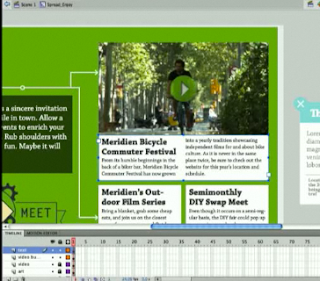
The Flash Professional CS5 Overview, included in our FSO EMDT Mac Pro applications, gave me loads of information. A lot has changed since I used it years ago, but it looks like there have been some fantastic practical features added. The Text Engine for one because you can add inDesign material to your Flash movie and it maintains the formatting. Plus, you can edit
inDesign animation pathways in Flash.

When it comes to working on a team project, Flash is superb! More than one person can work on a file at the same time, so production is quicker due to the xml database and .xfl file format. I wonder if we’ll be using this feature! We probably will, since we’ve been doing group projects in each course.

Tons of code snippets are included with Flash CS5. You can create and save your own custom code snippets to use in future projects. The cool thing is your custom classes or code appears in the drill down, when writing action script. That is a real time saver!

Wow, the Physics Engine is dynamic with the bone structures IK or armature system. In the Overview video the presenter made it look so easy. Just a few clicks and the street signs came alive. I hope it is that way, when we start to use it.

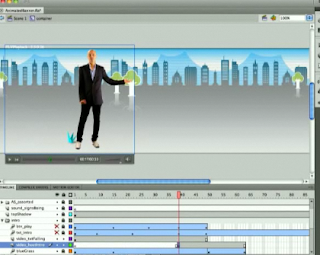
Placing videos in your movies is nothing new, but editing your movie in real-time with your video isn’t. You just stop your video where you want the action to begin and add the script to your movie. For instance, if I want to have a motion in my video to trigger an event in the movie, I can do that without running the video separate from the movie. There’s none of the run the movie to see if the timing is right; it just is because you are working with the video and movie in tandem. Now that is a super time saver!


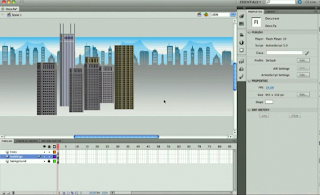
The Deco drawing tool has new brushes. You can create a building within seconds with the building brush tool. I looked for this feature and couldn’t find it, so I’ll need to take a look at the Overview again to see where it is. The learning curve on this tool might be a bit over my head at the moment.


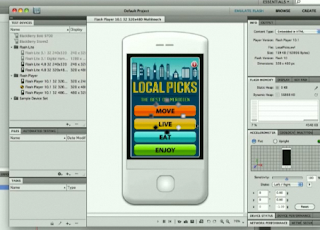
Using Flash Builder and Mobile Content looks like fun, but will be down the road after I get the basics down. The good thing is you can edit classes in Flash Pro or builder. If I choose to use Flash Builder it will create a project for me and build it out. After that I can flip back to Flash Pro, easily. Also, if I’m building a Mobile application I can view it as such. It functions like a real phone, but it’s 2D. That can save time in the beta phase of your application. To cool!

I can’t wait to use Flash CS5 with all of its wonderful features. The possibilities are endless in what you can create. It is so far beyond what I was using years ago; it’s like I’ve never used it before. I’ll be going through some tutorials, so stay tuned.

Saturday, July 24, 2010

BP11_Platogo1minuteVideo

Hope you like it!

BP10_Comment2BrookeMcKaig

"Follow this link to my comments on Brook's blog."


BP9_Comment2Kiylise Crutchfield

"Follow this link to my comments on Kiylise's blog."

BP8_Platogo

Platogo is a social networking Flash gaming site. It works like this. You upload your flash games and then add friends, challenges, rewards, and level editor components. Compare you’re your scores to friends, challenge them in game play, give rewards and edit one of your game levels with the level editor.

Some of the other great things about Platogo are the plethora of tutorials, developer center, and the earn money features. Some of the tutorials are about: game loading, getting started, high scores, rewards, money, and game data. In the developer center you find the Facebook Guide, social feature components, and how to monetize your game. To make money with your game you can use ads plus sell game and player upgrades.

For a wider audience for you games you can share them with the entire Platogo community and/or get even more exposure by loading them on to Facebook using the Platogo guide provided. This manual is straightforward and gives you step-by-step instructions on how to that.

To broaden my student’s perspective on Flash games, I’m going to have them play and evaluate games on Platogo. It always helps to see how someone else puts something together because you get ideas of how you can make it better or different. Also, you might say, “Wow, how did they do that?,” which gets curiosity and creativity going. It makes you want to figure out how they did it.

My online gaming students are going to be excited about this site, but I’m going to check it out further to see if I can create a private Facebook group that they can load their games to. Furthermore, I’ll need school and parent permission.